
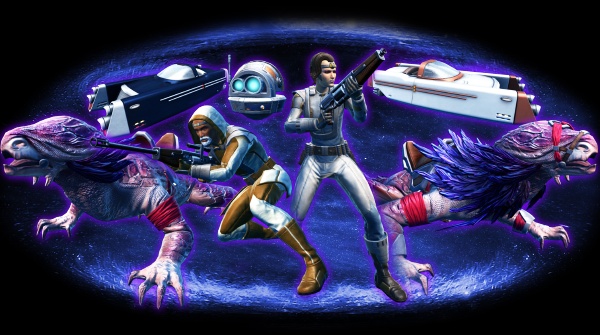
Done and Dusted is an Uprising in Star Wars the Old Republic available to all players at level 10+. Players must liberate Mos Pelgo and defeat the Dust Viper Bandits that have overtaken the town on Tatooine.
Contents
How to Play Uprisings

Uprisings are smaller, ‘arcade’ style Flashpoints (dungeons) in SWTOR that can be played by anyone level 10 or above. Unlike Flashpoints, Uprisings ONLY contain enemies and boss encounters, as they have no story cutscenes or dialogue.
Most Uprisings take between 10-15 minutes to complete and can be difficult to play Solo. Duo or Group play is recommended for Story and Veteran difficulty while Master Mode Difficulty requires a Group of 4 level 80 players.

There are Two different ways to play Uprisings in SWTOR:
1. You can queue Uprisings in the Group Tab of the Activities Window (Ctrl + G default).
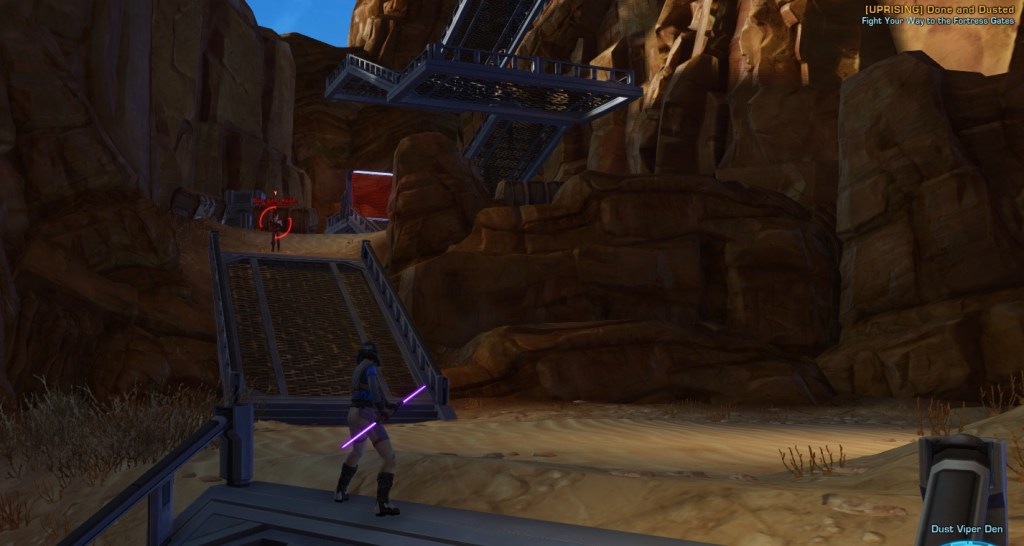
2. You can manually enter an Uprising solo or with a group by finding the Hologram Table next to the Heroic Computer in the Combat section of Fleet, choosing an Uprising and then clicking the Uprising Transport button in your mission log (pictured above).
Uprisings are a feature of Galactic Season 8 – Rising Powers in SWTOR, to see all information regarding Uprisings in GS8, read this guide:
Complete Guide to Galactic Season 8 Rising Powers, all rewards and achievements.
Continue to the guide.
Difficulties
Uprisings are available to all players above level 10 in THREE difficulties on the Fleet as well as through Groupfinder:
Story – Available to all players level 10+ Despite being named [Story] difficulty, Story Uprisings can be beaten in a Group of 2 players and 1 Healing Companion.
Veteran – Available to all players level 10+. The only major difference between [Story] and [Veteran] Uprisings is the amount of Health and Damage that each boss has.
Veteran Uprisings can be beaten in a Group of 2 players and 2 Healing Companions however 4 players is recommended (1 Tank, 2 DPS , 1 Healer).
Master – Should only be attempted by highly geared Level 80 players and requires a full group (1 Tank, 2 DPS, 1 Healer). All enemies in [Master] difficulty Uprisings are far more dangerous then their Veteran difficulty counterparts.
Power Ups
Players can find bright blue crates inside every single Uprising. Each of these Blue Crates contain 1 of 3 random Power Ups that players can use to help them defeat enemies faster.

There are 3 random Power-Ups that can be given to you when you open a Crate inside an Uprising, Power Ups spawn on your Temporary Hotbar and have 2 uses before they run out.
Rocket – The Rocket should be used on enemies with a Gold Star difficulty or enemies in a close group.
Grenade – The Grenade knocks enemies over and sets them on fire for a few seconds. It should be used on large groups of enemies.
Stimpack – The stimpack temporarily boosts ONE of your classes abilities with no penalty or cooldown. I suggest saving this Boost to use on Boss battles only.
Done and Dusted
When you first spawn inside the Uprising: Done and Dusted, you will be very far away from the first boss. You must kill every enemy you see before each area’s doorway opens to the next one.
You cannot use Stealth to Skip enemies inside Uprisings!
Make sure to kill each enemy group slowly, one at a time before moving to the next group. Keep following the metal staircases and pathways up the mountain until you reach the first boss.
Note: If you are playing the Done and Dusted Uprising in Master Difficulty and cannot beat the first groups of enemies, you will not be able to beat the Uprising. If you or your team are struggling against the regular enemies I suggest playing on an easier difficulty.
Jai Quallo

Jai Quallo is the First Boss in the Done and Dusted Uprising. He is the easiest boss in the Uprising and you can ignore his mechanics in Story Difficulty if you are using Heal Companions.
There are three Kolto Stations near the Boss you can use in Story and Veteran Difficulty to recover Hitpoints if you are low.
Mechanics:
- Every 15 seconds Jai Quallo will spawn random creatures, make sure to kill them as soon as possible.
- Between every group of Creatures, Jai Quallo will channel the ability Lacerating Shot to hit a random player.
- All players should group up together on the Boss so the enemy creatures come to you.
- At 35% Hitpoints Jai Quallo will summon a massive Sand Worm which should be killed as soon as possible.
Master Mode Tactics:
- In Master Mode Healers must tunnel heal/cleanse the player hit by Lacerating Shot or they will die.
- The player with the worst DPS should attack the creatures while the other DPS and Tank stay on the Boss.
Once you have defeated Jai Quallo, click the Blue Panel in the middle of the large Metal Fence to open the door to the next boss.
Wild Attunement Buff – Bonus

Once you have defeated Jai Quallo, he will drop a Holographic Collar on the ground called the Wild Attunement Device. Every player in the group can walk over this Holographic item to pick up the device, which allows all members of the group to summon extra Creature Companions to fight alongside you in the Uprising.
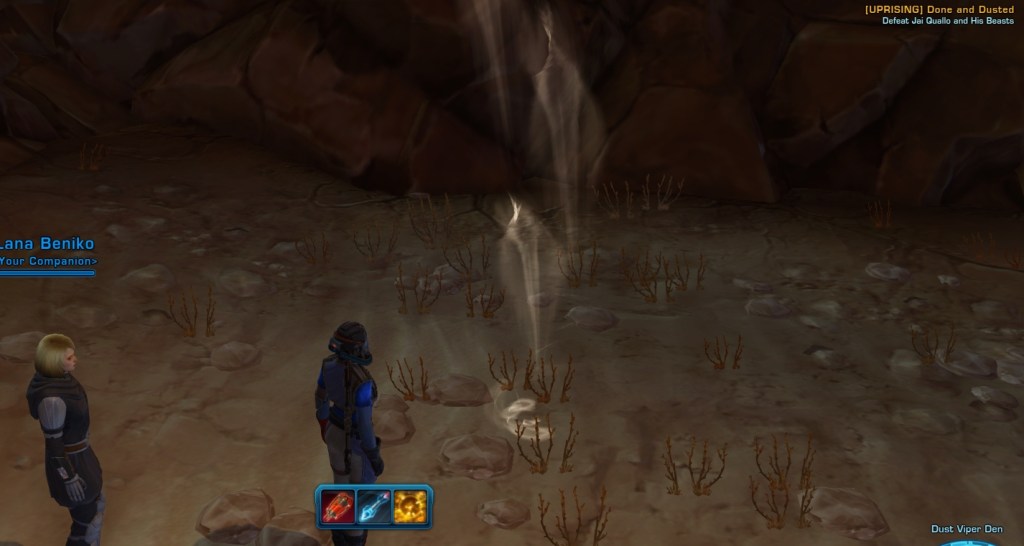
Once you have the Wild Attunement debuff, locate a Whisp of Air effect somewhere in the Uprising and click the Buff to be given a special Creature Companion that can help you fight Bosses.
There are a total of 12 random Creature companions you can be given.
Crack-Shot Aggy

Crack-Shot Aggy is the Second Boss in the Done and Dusted Uprising. While she is easy to defeat, you must still pay attention to her Mechanics even in Story Mode.
There are four Kolto Stations near the Boss you can use in Story and Veteran Difficulty to recover Hitpoints if you are low, However the Kolto Stations are also used for the Final Boss, so make sure not to use too many or you wont have them later!
Mechanics:
- Every 25 seconds Crack-Shot Aggy will spawn enemy Dust Viper Bandits. One player should focus on killing them and leaving the other players to defeat the boss.
- A random player will be targeted by Aggy with a large Red Line between her gun and the player, to break line of sight, hide behind any large boxes as cover. A message appears in the middle of the screen of the player that has been targeted.
- Make sure to kill all the Dust Viper Bandits quickly, as they spawn often and can overwhelm players.
Master Mode Tactics:
- One player should permanently run around killing Dust Viper Bandits, leaving the Tank and other DPS to stay on the Boss.
- The player targeted by Crack-Shot Aggy needs to break line of sight in Master Mode or they will die to her sniper shot.
- There are explosive mines that ONLY spawn on the sand in Master Mode. To avoid running into them, leap to the boss or walk on top of the crates/containers.
If you find this Guide helpful, consider tipping $1 to Support TodayinTOR and unlock rewards!
Bonus Boss Rakesh the Foul
Once you have defeated Crack-Shot Aggy, you can choose to continue to the Third Boss or turn around and defeat the optional, Bonus Boss – Rakesh the Foul.

Turn around and find the large House guarded by Security Droids, enter the house and continue fighting Droids until you find Rakesh the Foul.
Take the ladder upstairs and you can fight Rakesh the Foul on the rooftop.

Rakesh the Foul is the Bonus Boss in the Done and Dusted Uprising. He is relatively easy to defeat in Story and Veteran Mode.
There are three Kolto Stations near the Boss you can use in Story and Veteran Difficulty to recover Hitpoints if you are low.
Mechanics:
- Rakesh will use a large Knockback in a red cone every 30 seconds on whoever has aggro. For best results, have the tank place their back against the small square house to avoid being knocked off the roof.
- Avoid all red circles on the Ground.
- If you are thrown off the roof, you can use the blue Grapple boxes to teleport back onto the roof (pictured below).

Master Mode Tactics:
- Have the Tank stand against the small square house on the roof to avoid being thrown off.
- The longer the fight takes, the less DPS you do against Rakesh, so try to defeat him as quickly as possible. If you reach the point that you are dealing 0 DPS, your team does not have enough damage to defeat him.
- When Rakesh the Foul reaches 10% Hitpoints, he will do a knockback in a full circle that covers the entire roof, even outside of the red area! To avoid being thrown off the roof, stand directly ontop of Rakesh.
Viper Walker
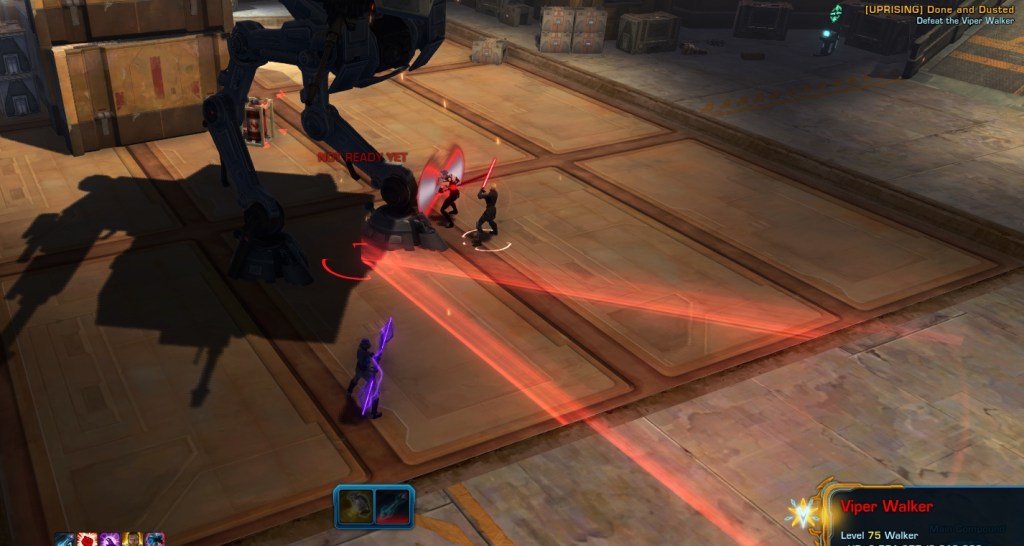
Viper Walker is the Third Boss in the Done and Dusted Uprising. While the walker is easy to defeat, you must still pay attention to it’s Mechanics in Story Mode.
There are four Kolto Stations near the Boss you can use in Story and Veteran Difficulty to recover Hitpoints if you are low, However the Kolto Stations are also used for the Final Boss, so make sure not to use too many or you wont have them later!
Mechanics:
- Every 10 seconds the Walker will Stomp the ground, shown in a large red triangle. All players need to stand outside of the Triangle or they will be knocked over!
- Avoid ALL large red circles on the Ground.
- Twice during the fight, the Viper Walker will spawn Repair Droids (pictured below). They must be defeated as quickly as possible.

The Repair Droids spawn all over the bunker and can be seen by following the Green Lines from the Viper Walker to the Droids. They die in one hit but must be killed quickly as they regenerate the Viper Walker’s Hitpoints by 1% per second.
Master Mode Tactics:
- In Master Mode, Exterminator Droids will spawn with Repair Droids. One DPS player should permanently run around killing all Exterminator droids while the other DPS and Tank attack the Boss.
- When Repair Droids spawn, both DPS should attack or use the Power-Up Grenades to destroy all the Repair Droids as quickly as possible.
- The Tank player should stand with their back to the large cargo containers and only move to avoid the walkers Stomp attack.
- The Viper Walker will sometimes attack the Tank with an ability called Eradicate. When the boss starts using Eradicate on the tank, they need to quickly move out of the red circle or they will be killed.
Final Boss Bel Nerodia and G9-RX
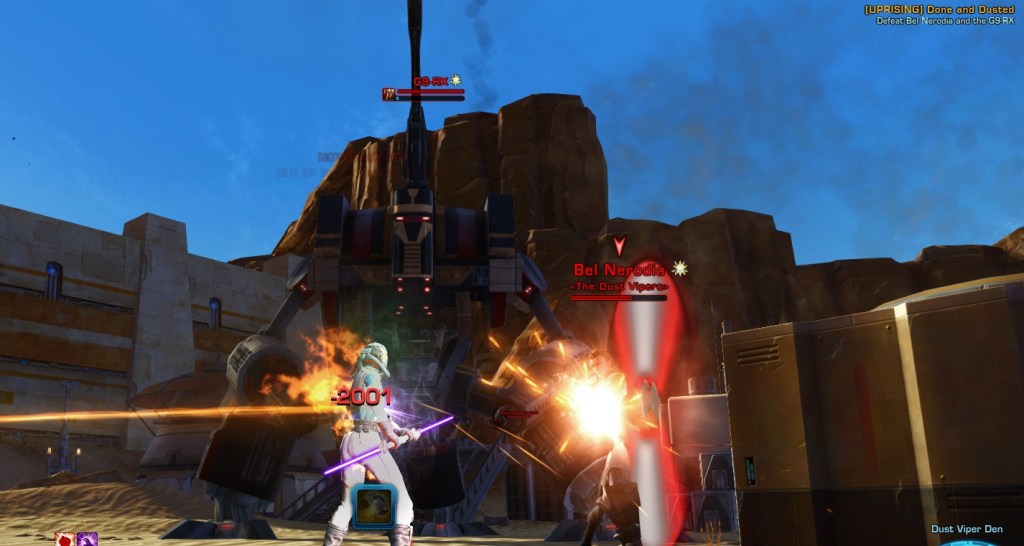
Bel Nerodia and G9-RX are the Final Bosses in the Done and Dusted Uprising. Even in Story Mode they can be quite difficult to defeat.
G9-RX uses red circle AOE attacks and Bel Nerodia spawns Dust Viper enemies, therefore it is better to defeat Bel Nerodia first then G9-RX second as it stops extra enemies from spawning!
Mechanics:
- Every 20 seconds, Bel Nerodia will spawn enemies which can be ignored for a little while but need to be defeated.
- Bel Nerodia will soemtimes stun a random player by throwing a knife at them, be careful you are not standing inside of red circles.
- Avoid ALL red and white circles on the Ground.
- Do not fight in the open, your group can use the cargo containers in the middle of the map as cover so Dust Viper Bandits group up to fight you.

Large Red circles hurt a lot, however there are much harder to see white circles that stun the player. If you stand inside a white circle, any other damage from red circles will kill you.
Companions take less damage from Red Circles than players do in Story and Veteran difficulty!
Master Mode Tactics:
- Have the weakest DPS player attack all the Dust Viper enemies while the Tank and other DPS attack Bel Nerodia first.
- Never stand inside any white or red circles or you will more then likely die.
- Always kill Bel Nerodia first in Master Mode, as the Dust Viper enemies will kill your group faster then red circles spawn.
Once you have defeated Bel Nerodia and G9-RX the Uprising is finished! Make sure to loot the large rocket that crashes into the ground.
There is a very small chance in any difficulty that the rare Covert Duster mount will be rewarded to a random player that loots the Large Rocket at the end of the Uprising.
To leave the Uprising, click the Exit Area button on your screen.
Achievements and Rewards
There are 29 Achievements and 3 Rewards you can earn from the Done and Dusted Uprising:
Story Difficulty Achievements
- Beast Mode (Story) – Defeat Jai Quallo on Story difficulty.
- High Noon (Story) – Defeat Crack-Shot Aggy on Story difficulty.
- Beyond Repair (Story) – Defeat the Viper Walker on Story difficulty.
- Desert Viper (Story) – Defeat Bel Nerodia and G9-RX on Story difficulty.
- Dust in the Wind (Story) – Killed every Boss in the Done and Dusted Uprising on Story Difficulty.
Veteran Difficulty Achievements
- Beast Mode (Veteran) – Defeat Jai Quallo on Veteran difficulty.
- High Noon (Veteran) – Defeat Crack-Shot Aggy on Veteran difficulty.
- Beyond Repair (Veteran) – Defeat the Viper Walker on Veteran difficulty.
- Desert Viper (Veteran) – Defeat Bel Nerodia and G9-RX on Veteran difficulty.
- Dust in the Wind (Veteran) – Killed every Boss in the Done and Dusted Uprising on Veteran Difficulty.
Master Difficulty Achievements
- Beast Mode (Master) – Defeat Jai Quallo on Master difficulty.
- High Noon (Master) – Defeat Crack-Shot Aggy on Master difficulty.
- Beyond Repair (Master) – Defeat the Viper Walker on Master difficulty.
- Desert Viper (Master) – Defeat Bel Nerodia and G9-RX on Master difficulty.
- Dust in the Wind (Master) – Killed every Boss in the Done and Dusted Uprising on Master Difficulty.
Miscellanious Achievements
- Beast Wrangler (Sandbat) – Summoned a Sandbat with the Wild Attunement Device.
- Beast Wrangler (Dewback) – Summoned a Dewback with the Wild Attunement Device.
- Beast Wrangler (Duneclaw) – Summoned a Duneclaw with the Wild Attunement Device.
- Beast Wrangler (Bantha) – Summoned a Bantha with the Wild Attunement Device.
- Beast Wrangler (Reek) – Summoned a Reek with the Wild Attunement Device.
- Beast Wrangler (Rill) – Summoned a Rill with the Wild Attunement Device.
- Beast Wrangler (Scyk) – Summoned a Scyk with the Wild Attunement Device.
- Beast Wrangler (Womp Rat) – Summoned a Womp Rat with the Wild Attunement Device.
- Beast Wrangler (Wraid) – Summoned a Wraid with the Wild Attunement Device.
- Beast Wrangler (Sandtusker) – Summoned a Sandtusker with the Wild Attunement Device.
- Beast Wrangler (Sand Demon) – Summoned a Sand Demon with the Wild Attunement Device.
- Beast Wrangler (Sand Worm) – Summoned a Sand Worm with the Wild Attunement Device.
- Master Beast Wrangler – Summoned every creature with the Wild Attunement Device. Reward: Jai Quallo’s Sand Worm Decoration
- Rage Awakened – Defeated Rakesh the Foul in any difficulty. Reward: Rakesh the Foul Decoration
Rewards
There are 3 rewards you can earn from the Done and Dusted Uprising in SWTOR:
- Covert Duster Mount – Rare loot that drops from the final boss in any difficulty (more common in Master Difficulty).
- Jai Quallo’s Sand Worm Holographic Decoration – Complete the achievement Master Beast Wrangler.
- Rakesh the Foul Holographic Decoration – Complete the achievement Rage Awakened.
Latest News
- SWTOR DirectX 12 Update
 Everything we know about the DirectX 12 update coming to SWTOR in 2026.
 - SWTOR April Cartel Market Sales 2026
 All Cartel Market items that are part of SWTOR’s April 2026 Cartel Sale.
 - SWTOR Galactic Season 10 Guide
 Complete Guide to Galactic Season 10 Secrets of the Syndicate, all rewards and achievements.
 - SWTOR PH4-LNX Companion Guide
 Companion Guide for PH4-LNX in SWTOR, including Story, Customization, Reputation & Achievements!
 - SWTOR Dantooine Spring Event Guide 2026
 Dantooine Spring Abundance Festival Guide in SWTOR. Including all Quests, Rewards and Achievements.
 - SWTOR Altuur Zok Adon Companion Guide
 Companion Guide for Altuur Zok Adon in SWTOR, including his Story Quests, unique Abilities & Customizations!
 - SWTOR 7.8.1 Master’s Enigma Update News
 Everything about SWTOR 7.8.1 Masters Enigma, including story, Date Nights and new content.
 - SWTOR Continue the Fight BundleEverything you need to know about the Continue the Fight Bundle in SWTOR.
Enjoy my content and want to see more? You can support me by following me on Twitter or Join the Discord Community!
May the Force be with you ❤
If you liked my Content, consider tipping
to keep TodayinTOR.com Online!

Become a part of the SWTOR Community!
