
Firefrost is an Uprising in Star Wars the Old Republic available to all players at level 10+. Players must liberate Hoth and defeat Forgemaster Droub of the White Maw Pirates.
Contents
How to Play Uprisings

Uprisings are smaller, ‘arcade’ style Flashpoints (dungeons) in SWTOR that can be played by anyone level 10 or above. Unlike Flashpoints, Uprisings ONLY contain enemies and boss encounters, as they have no story cutscenes or dialogue.
Most Uprisings take between 10-15 minutes to complete and can be difficult to play Solo. Duo or Group play is recommended for Story and Veteran difficulty while Master Mode Difficulty requires a Group of 4 level 80 players.

There are Two different ways to play Uprisings in SWTOR:
1. You can queue Uprisings in the Group Tab of the Activities Window (Ctrl + G default).
2. You can manually enter an Uprising solo or with a group by finding the Hologram Table next to the Heroic Computer in the Combat section of Fleet, choosing an Uprising and then clicking the Uprising Transport button in your mission log (pictured above).
Uprisings are a feature of Galactic Season 8 – Rising Powers in SWTOR, to see all information regarding Uprisings in GS8, read this guide:
Complete Guide to Galactic Season 8 Rising Powers, all rewards and achievements.
Continue to the guide.
Difficulties
Uprisings are available to all players above level 10 in THREE difficulties on the Fleet as well as through Groupfinder:
Story – Available through Groupfinder to all players level 10+ Despite being named [Story] difficulty, Story Uprisings can be beaten in a Group of 2 players and 1 Healing Companion.
Veteran – Available to all players level 70+. The only major difference between [Story] and [Veteran] Uprisings is the amount of Health and Damage that each boss has.
Veteran Uprisings can be beaten in a Group of 2 players and 2 Healing Companions however 4 players is recommended.
Master – Should only be attempted by highly geared Level 80 players and requires a full group (1 Tank, 2 DPS, 1 Healer). All enemies in [Master] difficulty Uprisings are far more dangerous then their Veteran difficulty counterparts.
Power Ups
Players can find bright blue crates inside every single Uprising. Each of these Blue Crates contain 1 of 3 random Power Ups that players can use to help them defeat enemies faster.

There are 3 random Power-Ups that can be given to you when you open a Crate inside an Uprising, Power Ups spawn on your Temporary Hotbar and have 2 uses before they run out.
Rocket – The Rocket should be used on enemies with a Gold Star difficulty or enemies in a close group.
Grenade – The Grenade knocks enemies over and sets them on fire for a few seconds. It should be used on large groups of enemies.
Stimpack – The stimpack temporarily boosts ONE of your classes abilities with no penalty or cooldown. I suggest saving this Boost to use on Boss battles only.
Firefrost Uprising
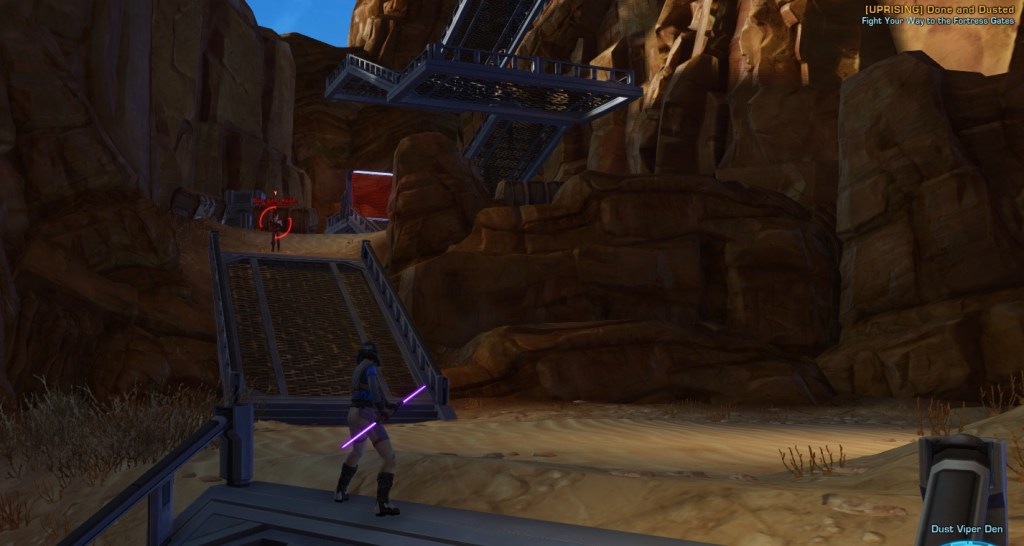
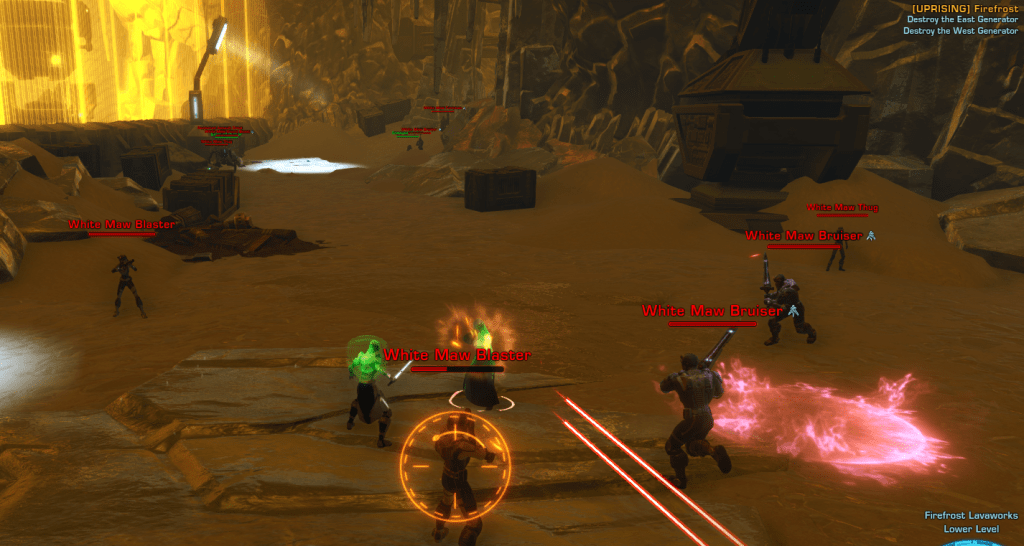
When you first spawn inside the Uprising: Firefrost, you will be very far away from the first boss. You must kill every enemy you see before each area’s doorway opens to the next one. To start the Uprising, go down the large Elevator.
You cannot use Stealth to Skip enemies inside Uprisings!
Make sure to kill each enemy group slowly, one at a time before moving to the next group. Keep following the pathways through each room until you reach the first boss.
Note: If you are playing the Firefrost Uprising in Master Difficulty and cannot beat the large groups of enemies, you will not be able to beat the Uprising. If you or your team are struggling against the regular enemies I suggest playing on an easier difficulty.
Refactored Battle Droid
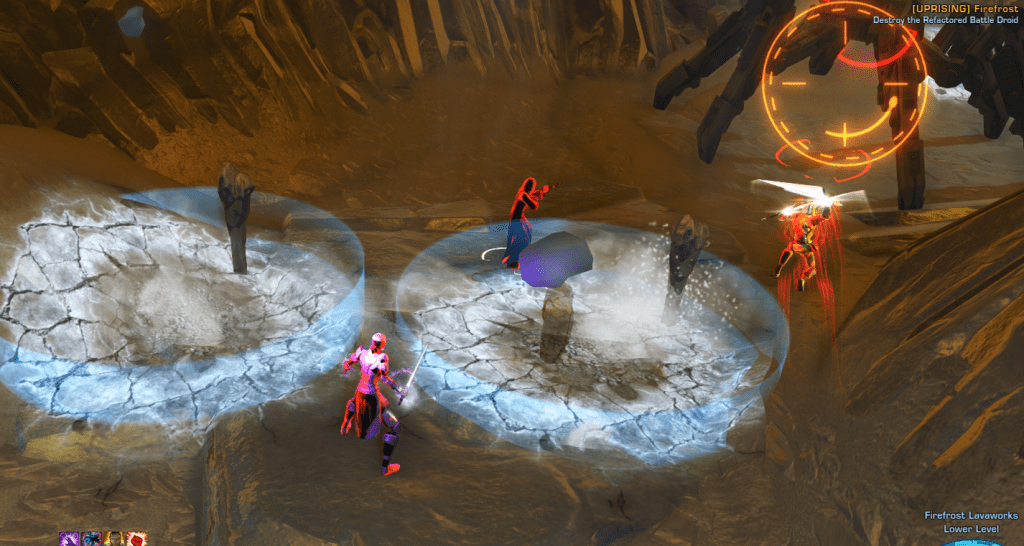
Refactored Battle Droid is the First Boss in the Firefrost Uprising. He is the easiest boss in the Uprising and you can ignore his mechanics in Story Difficulty if you are using Heal Companions.
There are three Kolto Stations near the Boss you can use in Story and Veteran Difficulty to recover Hitpoints if you are low.
Mechanics:
- Refactored Battle Droid will shake the ground, do not stand inside any white circles!
- At 66% and 33% HP the Refactored Battle Droid will summon small Burrower Droid Adds that must be killed quickly.
- Stand outside of the red circles created by the Burrower Droid Adds when they are defeated.
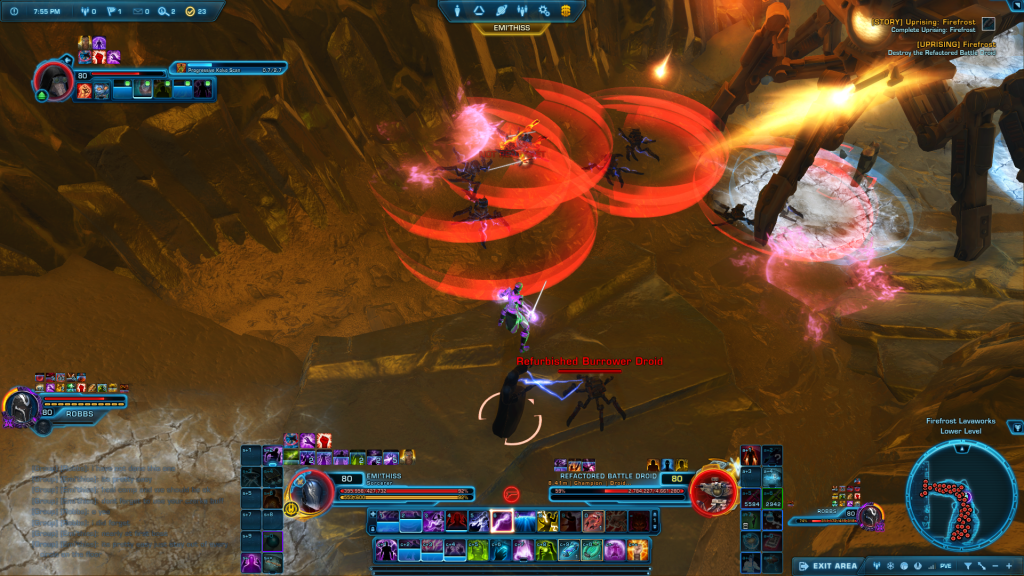
Master Mode Tactics:
- Make sure all players do not stand in the Blue or Red circles.
- The Tank should use Defensive abilities when the Boss uses the ‘Terminate’ ability. Heavy healing may be required to help the Tank recover HP.
Once you have defeated the Refactored Battle Droid, continue through the tunnel.
Shield Generators
Once you have defeated the Refactored Battle Droid, you will then need to destroy 2 Shield Generators at each end of a large room.
In Story and Veteran Difficulty if you are in a group of four you can split into two groups of two and take down both Shield Generators at the same time.
If you are playing Solo, in a small Group or in Master difficulty, you should stick together and only do one Shield Generator at a time.
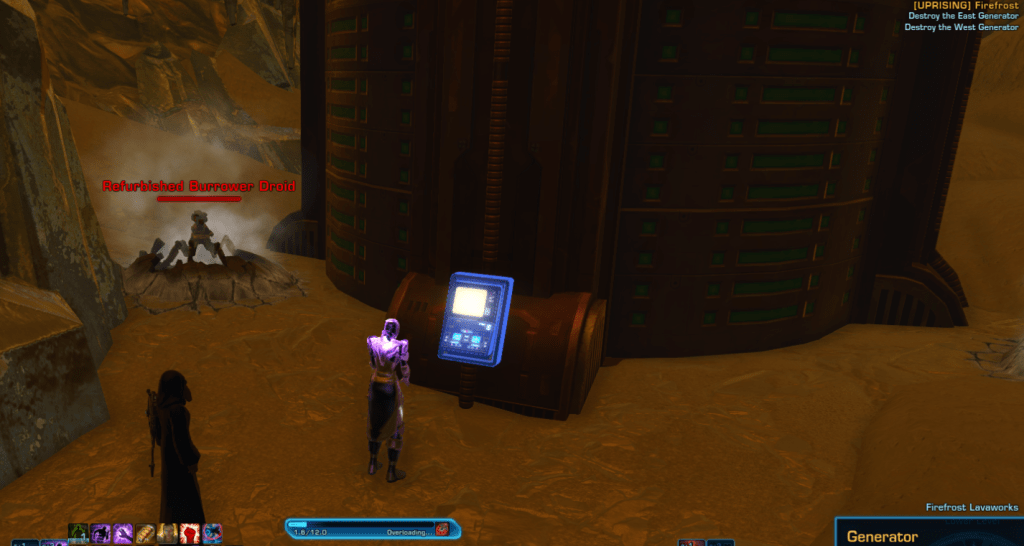
When you reach the end of the hallway, click the blue Generator button to destroy a Shield Generator. Defend the player clicking the button for 12 seconds while enemies spawn and attack the player clicking the button.
In Story Mode the Burrower Droid adds do not kill/hurt that much, in Master difficulty a DPS should click the button so that the Tank and Healer can defend them.
Once you have destroyed both Shield Generators, the large yellow hologram door in the middle of the room will open up to the final boss!
Walker and Forgemaster Droub
Autonomous Walker JS-MW1 and Forgemaster Droub is a two-part Final Boss in the Firefrost Uprising. You must defeat the Walker before you can attack Forgemaster Droub.
There are four Kolto Stations within the Boss Room you can use in Story and Veteran Difficulty to recover Hitpoints if you are low, However the Kolto Stations are shared for both Bosses, so make sure not to use too many on the Walker or you wont have them for Droub!
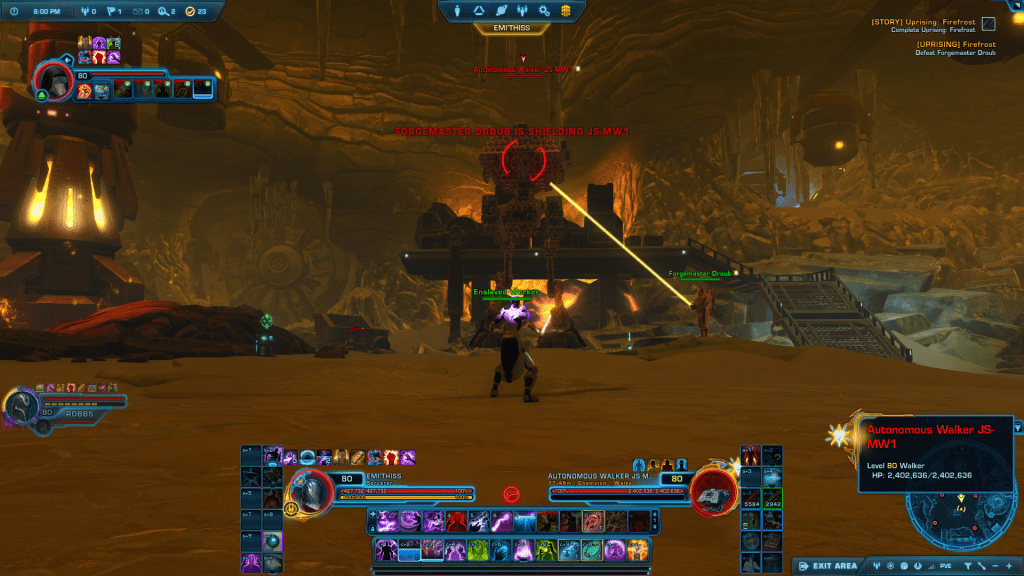
Autonomous Walker JS-MW1
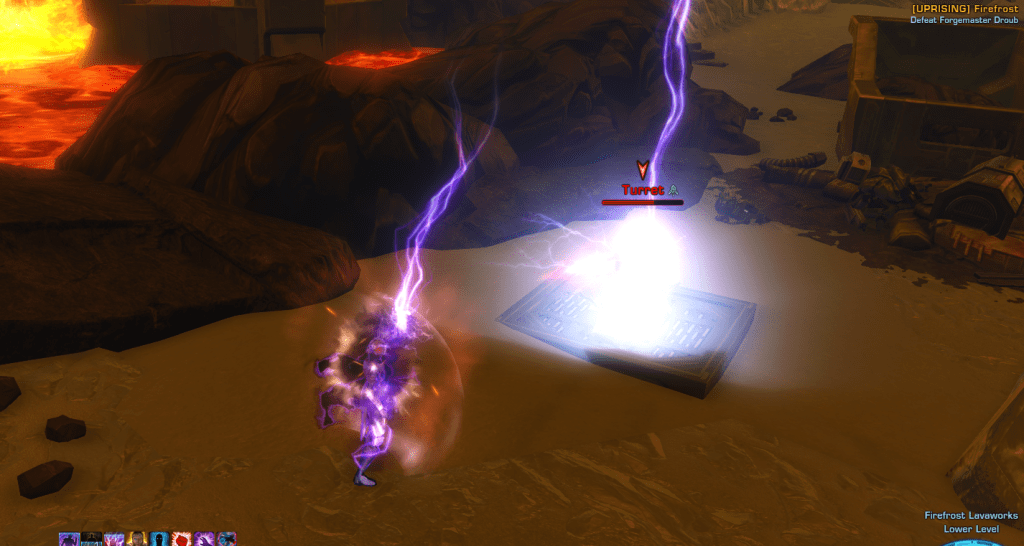
When you start the fight, you must destroy all 4 of the Turret’s in each corner of the room before the Walker will take damage. Once you have defeated the turrets, Droub will begin to slowly repair them one at a time.
You need to defeat the Walker Boss before Droub finishes repairing the fourth Turret, otherwise the boss fight will start over.
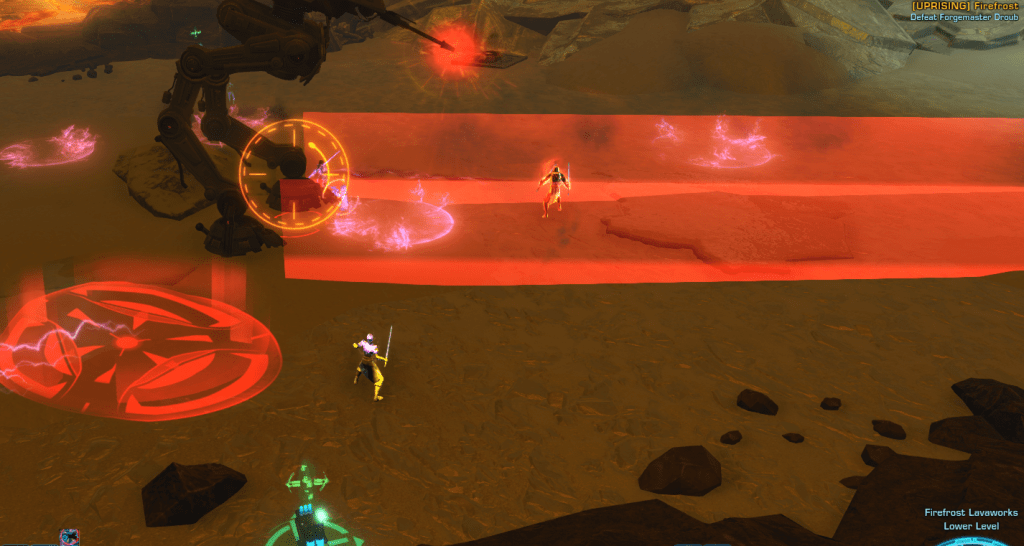
Mechanics:
- The Walker will stomp on the ground and deal a small amount of damage to all players in Melee Range.
- The Walker will create a large red cone that follows the Tank. The Tank should face the large red cone away from the group.
- Avoid all large red circles on the ground.
- Kill and avoid the Burrower Droid adds that spawn.
Master Mode Tactics:
- Master Only: The Walker will drop the same blue circles as the first boss, do not stand in them!
- The Tank should face the Walker away from the group at all times.
- Ranged DPS players and Healers should stay as far away from the Walker to reduce stomp damage from the Walker.
- The Tank should save their AOE/Group Taunt for when the Burrower Droid adds spawn, and then move out of the way so that the red circles hurt the Walker boss.
If you find this Guide helpful, consider tipping to help keep TodayinTOR.com online!
Forgemaster Droub
Once you have defeated Autonomous Walker JS-MW1, Forgemaster Droub will immediately attack you. He is very simple to beat and does not have many mechanics.
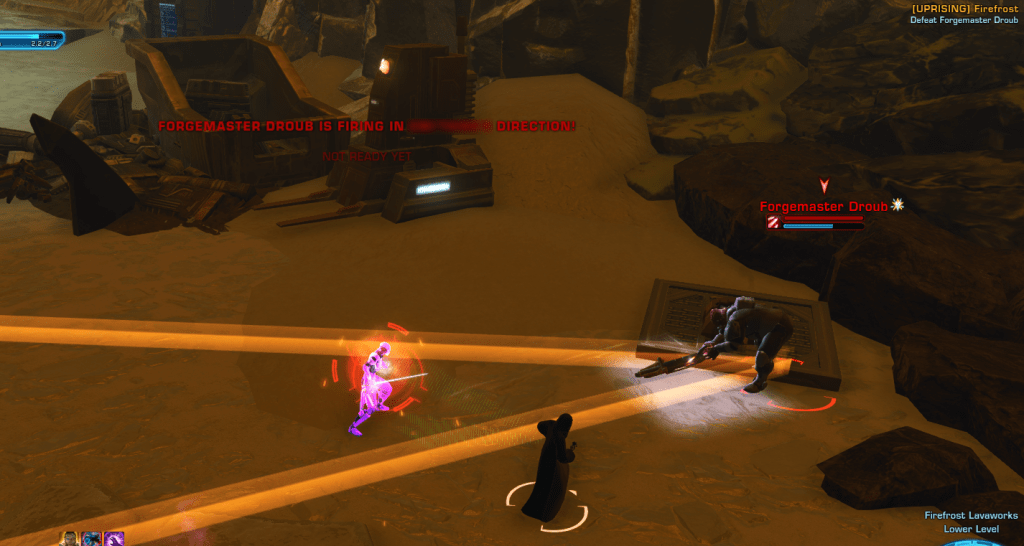
Forgemaster Droub will stop repairing turrets and attack the group. In story difficulty he does not deal much damage but can be lethal in Master difficulty if you are not careful.
Like the other bosses, Burrower Droid adds will spawn during the fight to disrupt players and drop red circles.
Mechanics:
- Forgemaster Droub will create a large orange cone attack called ‘Spray and Pray’. The player called out in Red Text that is being targeted by Droub needs to stand away from their group members.
- Kill and avoid the Burrower Droid adds that spawn when Droub reaches 60% HP.
Master Mode Tactics:
- The player being targeted by Droub should face the Boss away from the group immediately.
- The Tank should save their AOE/Group Taunt when the Burrower Droid adds spawn.

Once you have defeated Forgemaster Droub, loot the Reward Drop Rocket before you leave the Uprising!
Achievements and Rewards
There are 19 Achievements and 1 Mount you can earn from the Firefrost Uprising:
Story Difficulty Achievements
- A Cold Reception (Story) – Started the Uprising on Story difficulty.
- Release the Battle Droids! (Story) – Defeat Refactored Battle Droid on Story difficulty.
- Power Down (Story) – Disabled the Shield Generators on Story difficulty.
- Forgemaster Fired (Story) – Defeat Forgemaster Droub on Story difficulty.
- Lavaworks Liberation (Story) – Killed every Boss in the Firefrost Uprising on Story Difficulty.
Veteran Difficulty Achievements
- A Cold Reception (Veteran) – Started the Uprising on Veteran difficulty.
- Release the Battle Droids! (Veteran) – Defeat Refactored Battle Droid on Veteran difficulty.
- Power Down (Veteran) – Disabled the Shield Generators on Veteran difficulty.
- Forgemaster Fired (Veteran) – Defeat Forgemaster Droub on Veteran difficulty.
- Lavaworks Liberation (Veteran) – Killed every Boss in the Firefrost Uprising on Veteran Difficulty.
Master Difficulty Achievements
- A Cold Reception (Master) – Started the Uprising on Master difficulty.
- Release the Battle Droids! (Master) – Defeat Refactored Battle Droid on Master difficulty.
- Power Down (Master) – Disabled the Shield Generators on Master difficulty.
- Forgemaster Fired (Master) – Defeat Forgemaster Droub on Master difficulty.
- Lavaworks Liberation (Master) – Killed every Boss in the Firefrost Uprising on Master Difficulty.
Miscellanious Achievements
- The Frozen Dead – Defeat 1000 enemies in any difficulty of the Firefrost Uprising.
- Firefrost: Adrenal Assault – Defeat 100 enemies while using the Adrenal Power-Up in the Firefrost Uprising.
- Firefrost: Thermally Charged – Defeat 100 enemies with the Grenade Power-Up in the Firefrost Uprising.
- Firefrost: Rocketed – Defeat 100 enemies with the Rocket Launcher Power-Up in the Firefrost Uprising.
Rewards
There is a rare Mount 3 you can earn from the Firefrost Uprising in SWTOR:
- Covert Frost Mount – Rare loot that drops from the Rocket Drop Reward after Forgemaster Droub in any difficulty (more common in Master Difficulty).
Latest News
- SWTOR DirectX 12 Update
 Everything we know about the DirectX 12 update coming to SWTOR in 2026.
 - SWTOR April Cartel Market Sales 2026
 All Cartel Market items that are part of SWTOR’s April 2026 Cartel Sale.
 - SWTOR Galactic Season 10 Guide
 Complete Guide to Galactic Season 10 Secrets of the Syndicate, all rewards and achievements.
 - SWTOR PH4-LNX Companion Guide
 Companion Guide for PH4-LNX in SWTOR, including Story, Customization, Reputation & Achievements!
 - SWTOR Dantooine Spring Event Guide 2026
 Dantooine Spring Abundance Festival Guide in SWTOR. Including all Quests, Rewards and Achievements.
 - SWTOR Altuur Zok Adon Companion Guide
 Companion Guide for Altuur Zok Adon in SWTOR, including his Story Quests, unique Abilities & Customizations!
 - SWTOR 7.8.1 Master’s Enigma Update News
 Everything about SWTOR 7.8.1 Masters Enigma, including story, Date Nights and new content.
 - SWTOR Continue the Fight BundleEverything you need to know about the Continue the Fight Bundle in SWTOR.
Enjoy my content and want to see more? You can support me by following me on Twitter or Join the Discord Community!
May the Force be with you ❤
If you liked my Content, consider tipping
to keep TodayinTOR.com Online!

Become a part of the SWTOR Community!
